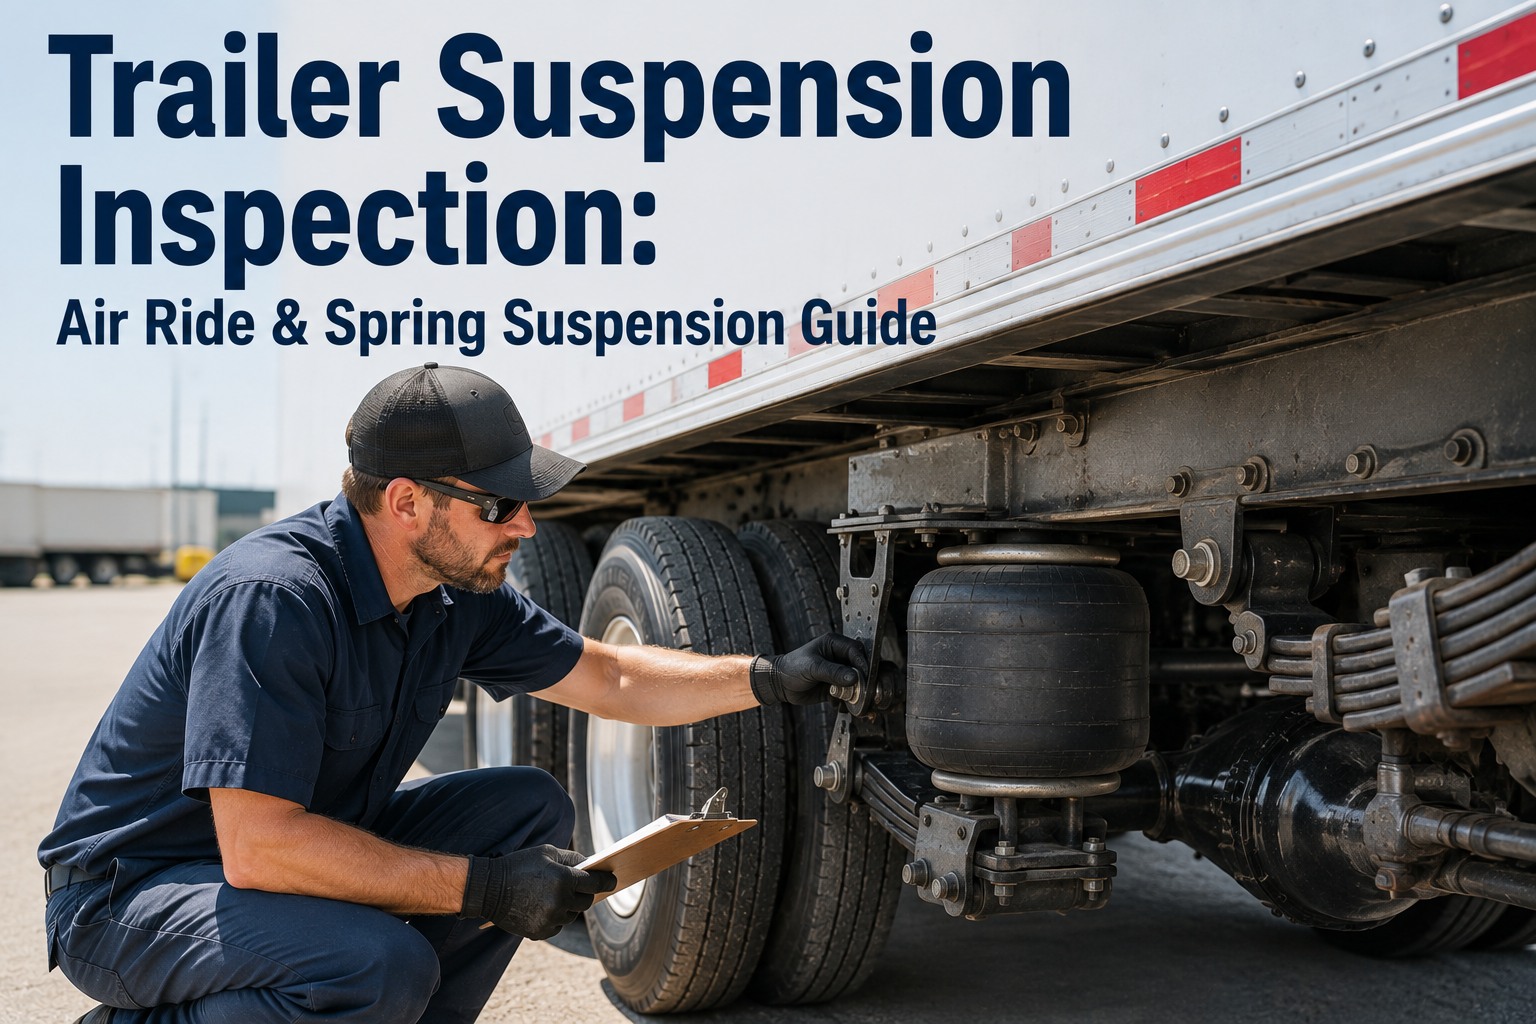
A trailer's suspension is what stands between a cargo load, the axles, and the road — and unlike brakes or lights, most suspension defects don't announce themselves with an obvious symptom until damage has cascaded to multiple components. A single failing bushing wears the next one down. A slow-leaking air bag drops ride height and misaligns the axle, which then chews the tire down at 3× the normal rate. A cracked leaf spring shifts load to shackles and equalizers, and by the time the noise gets loud enough to notice, the U-bolts are stretched and the axle is walking. Every one of these failure chains starts as a small defect that a systematic pre-trip would catch — and every one becomes a citation, a downtime event, or a rollover risk if it doesn't. There are two dominant suspension architectures on commercial trailers, and they fail differently: air ride systems with pressurized bellows offer superior ride quality and cargo protection but introduce leaks, height control valve failures, and shock absorber degradation as new failure modes; leaf spring systems are mechanically simpler and more forgiving under abuse but produce their own failure signatures around fatigue cracks, U-bolt stretch, and worn bushings. Under DOT regulations, the maximum allowable air leakage rate is 2 PSI per minute for single vehicles and 3 PSI per minute for combination vehicles — anything above that is a citation, and it's tested at every Level I inspection. This guide covers exactly how to inspect both systems — the 8 components on any trailer suspension, the air ride vs spring failure signatures, the leak rate math, ride height verification, the 6 most common OOS-triggering defects, and how Truck Inspection & Maintenance software builds photo-verified suspension DVIRs with ride-height measurements per unit so degradation is caught before it becomes damage. Ready to catch suspension problems before they cascade into major repairs? Start a free trial of Truck Inspection & Maintenance, or contact our support team for a walkthrough.
Trailer Suspension Inspection: Air Ride & Spring Suspension Guide
Two systems. Eight components. One PSI-per-minute leak rate limit. Here's how to inspect both without missing the small defect that becomes the big repair.
Air Ride vs Spring Suspension — Two Systems Compared
Almost every commercial trailer runs one of two suspension architectures. They share some inspection points but fail in fundamentally different ways. Know which system you're looking at before you start.
The 8 Core Suspension Components — Every Trailer
Regardless of air or spring configuration, every trailer suspension has 8 core components to inspect. Some are shared between systems; some are architecture-specific. Every one is a potential failure point.
The DOT Air Leak Rate Limit — Measured, Not Guessed
Air leakage isn't a "does it leak" test — it's a "how fast does it leak" test. DOT specifies precise maximum leak rates that get checked at every Level I inspection. Miss the limit and it's an immediate citation.
Ride Height — The Master Measurement
Ride height is the single most diagnostic measurement on a trailer suspension. It reveals air leaks, sagging springs, height control valve failures, broken components — all through one number. Take it at every PM.
The 6 Most Common Suspension OOS Failures
These six patterns dominate suspension out-of-service violations. Every one is caught by systematic inspection — none require special equipment beyond a tire gauge, a tape measure, and a good ear.
Measure ride height at every PM — trend catches decline early
Photo-verified suspension DVIRs. Ride height measurement logged per axle per unit. Air leak rate testing captured with soapy-water photos. Trend analysis flags trailers drifting from spec. Truck Inspection & Maintenance software makes the invisible slow decline visible before it becomes a broken component.
Warning Signs Drivers Should Report Immediately
Suspension failures rarely happen without warning. These are the seven driver-observable symptoms that mean "park it and inspect" — not "finish the route and mention it".
Frequently Asked Questions
Air ride uses pressurized rubber bellows (air bags) that inflate and deflate to support the trailer at a target ride height, controlled by a height control valve that senses load and adjusts pressure automatically. Advantages: better ride quality, less cargo damage, adjustable load support, easier on lightweight or fragile freight. Failure modes: air leaks, ruptured bellows, failed height control valves. Leaf spring suspension uses steel multi-leaf spring packs mounted through hangers, shackles, and U-bolts to carry load and absorb impact. Advantages: mechanically simple, more forgiving under abuse, cheaper components, no air system to leak. Failure modes: cracked or broken leaves, stretched U-bolts, worn shackle bushings, sagging pack. Most modern van and reefer trailers are air ride; heavy-haul, flatbed, and specialty trailers often stay spring. Truck Inspection & Maintenance software tracks suspension type per unit with system-specific inspection checklists.
DOT regulations specify precise maximum leak rates. For a single vehicle (straight truck without trailer), the maximum allowable air pressure loss is 2 PSI per minute. For a combination vehicle (tractor with trailer or trailers), the maximum is 3 PSI per minute. The test is conducted with the system pressurized to normal operating pressure (typically 120–130 PSI), engine off, service brakes released, and wheels chocked. Any pressure loss exceeding these limits is a citation at Level I inspection and typically triggers a search for the leak source before the vehicle can operate. Common leak sources include cracked air lines, failed fittings, ruptured air bags, and leaking height control valves — soapy water applied to fittings reveals most leaks quickly.
Every OEM publishes a target ride height for its suspension, measured from a specific reference point (typically frame to axle, or hub center to fender edge). Follow the manufacturer's exact procedure — measurement points differ between Hendrickson, SAF Holland, Meritor, and other suspension makers. Measure at every PM, log the number, and compare against spec. Take the measurement at both sides and all axles: both sides should be equal (no lean), and all axles should sit at the same height. A ride height drifting below spec over time indicates a slow air leak, a fatiguing spring pack, or a failing height control valve — long before it becomes a citation. Trend analysis of ride height across PMs catches degradation invisible to a single walk-around.
One-sided sag has three main causes. On air ride: a leaking air bag on the low side (cracks, dry rot, ruptured bellows) or a failed height control valve keeping one side under-inflated. On spring suspension: a broken or cracked leaf on the low side, a stretched U-bolt letting the axle shift, or a worn shackle bushing on that side letting the corner settle. On any suspension: a worn or cracked equalizer letting one axle drop, or a cracked spring hanger where it welds to the frame. Every one-sided sag causes axle misalignment, which then produces tire scrubbing on the affected axle at 3× the normal wear rate — so what starts as a $200 bag replacement becomes a $1,200 tire replacement if ignored. Contact our team to see how the software flags one-sided ride height differences.
A leaking shock is not itself an automatic out-of-service condition — but it's a defect that should be repaired promptly. Consequences of running a leaking or dead shock: reduced service life on air bags or spring packs (unabsorbed impact goes to the springs), premature tire cupping and feathering from uncontrolled axle motion, reduced ride quality, and eventual bushing wear from harsher shock loads. A shock body that's cold to the touch after operation (rather than warm) indicates internal damping failure even without visible leakage — a warm shock body is a working shock. Replace shocks in pairs (same axle, both sides) to keep damping balanced.
Every trailer suspension needs three layers of inspection. Pre-trip (daily): visual check of air bags, springs, shocks, hangers, and U-bolts; audible check for air leaks; verification that the trailer sits level and at spec ride height. Weekly: closer inspection of shocks for leakage, torque check on visible U-bolts, grease service on pivot points and equalizers per manufacturer schedule. PM interval (typically 90 days or by mileage): ride height measurement logged per axle, complete air leak rate test, torque check on all suspension fasteners, bushing wear inspection, alignment verification. Annual DOT inspection: full component condition assessment as part of § 396.17. Trend the ride height number across PMs — that single measurement catches the slow decline that produces expensive failures. Try free: sign up here.
Truck Inspection & Maintenance software catches suspension decline before it becomes damage
Suspension type flagged per trailer (air ride vs spring). Air leak rate testing captured with photos. Ride height measurement per axle logged at every PM. Bushing wear tracking. Shock condition history. U-bolt torque records. Trend analysis on ride height flags trailers drifting from spec before citation. Every element of § 393 and § 396 suspension compliance managed in one platform — because a $200 bag replacement is orders of magnitude cheaper than the $1,200 tire replacement and roadside citation it prevents.